Check out the video tutorial (web portal only) or documented details below (web portal and app) on how to request a signature for a document.
What Can You Do
-
Send documents by email to multiple customers or patients (end user or signer) for signature.
-
End users can review and sign or decline documents.
-
All parties receive notifications and document copies.
-
Documents are also automatically delivered or uploaded into integrated applications.
How to Request a Signature
To use the 'Send to Sign' feature you must be subscribed to the Advanced plan. If you are subscribed on the Essentials plan, just upgrade your account subscription to the Advanced plan. The Send to Sign feature allows for signatures, initials and dates to be requested by up to five (5) signers in a specified order from both the Documents page of the web portal and directly within the document in the app on the mobile device. The information below will provide details on how to perform a Send to Sign through the web portal. To see how to perform the action via the app on the mobile device see Send a Document for Signature (iOS App).
1. Submit a Document
In order to send a document for signature, first the document needs to be filled out in the mobile app or via the Add Document functionality. Once the document is filled out or completed and is ready for signature, the document MUST be submitted. The submitted document is processed as per the standard output settings and any integration setup (i.e. JobNimbus, WorkWave) and available in the Documents page of the naturalForms web (admin) portal.
2. Request A Signature for a Document
After the document has been submitted, the document can be sent for signature from the Documents page of the web portal which can also be access via a mobile device using a browser (i.e. Google Chrome or Safari).
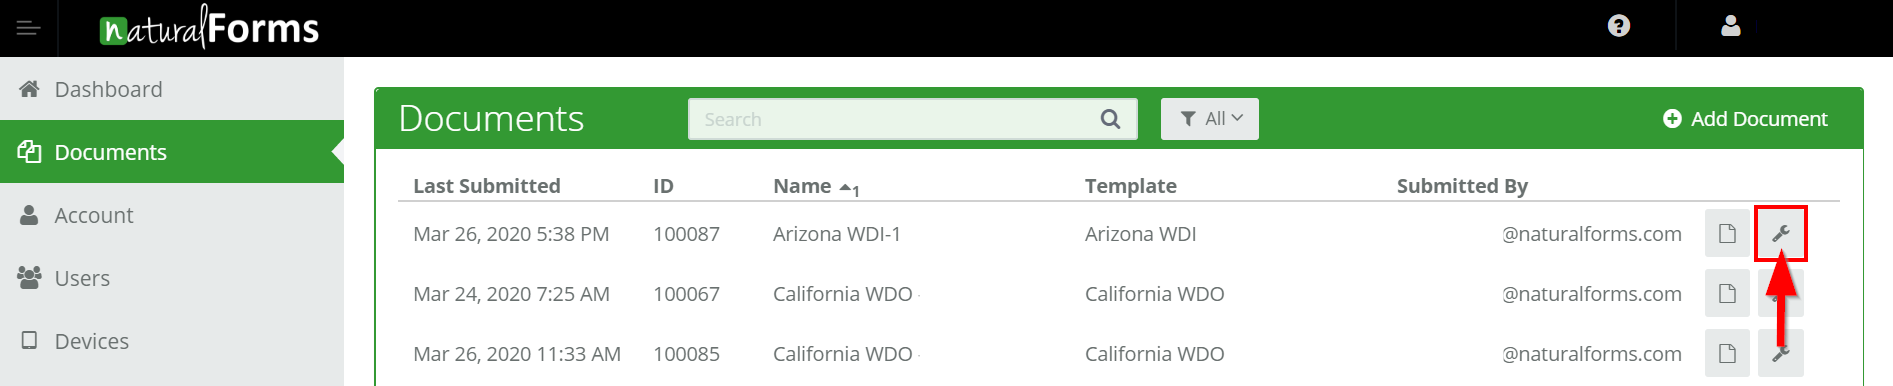
A. Open the Tools Menu | Open the Tools menu from the Documents page.
Tools Menu
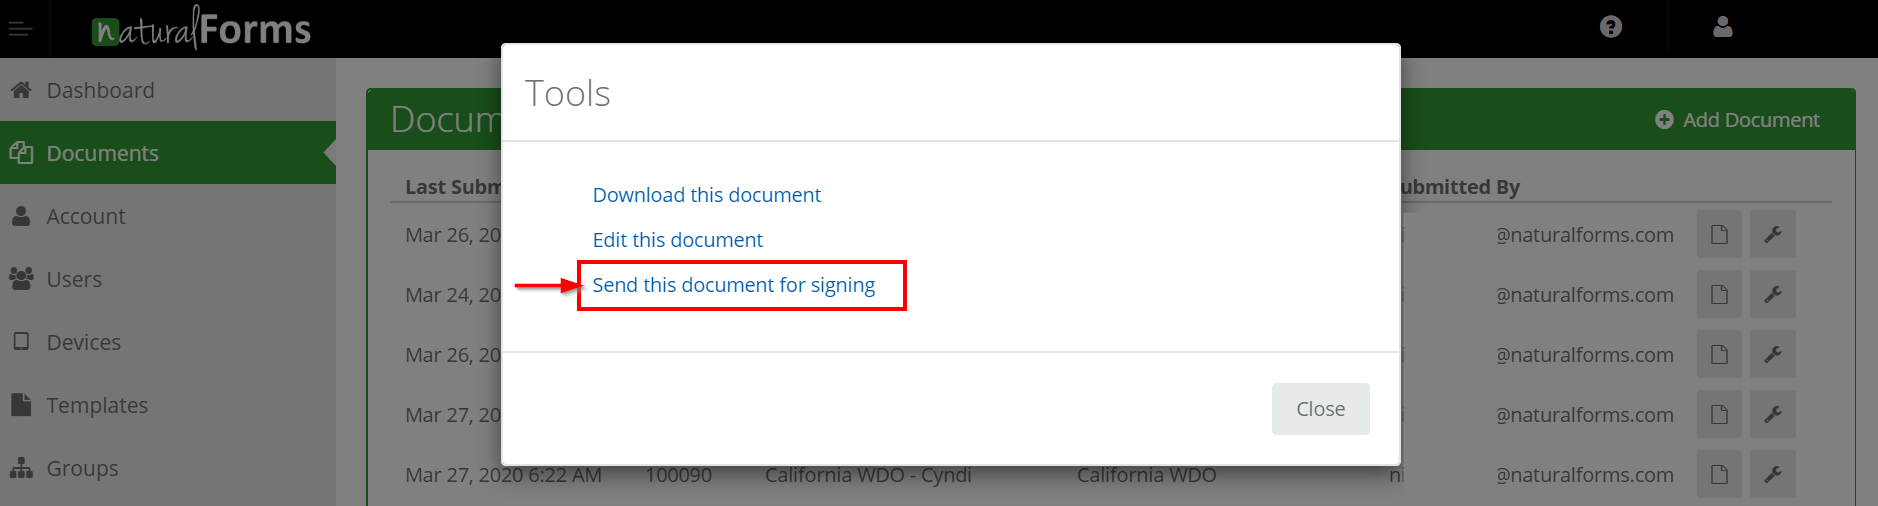
B. Click Send to Sign | In the Tools menu click Send this document for singing.
Send to Sign Menu Item
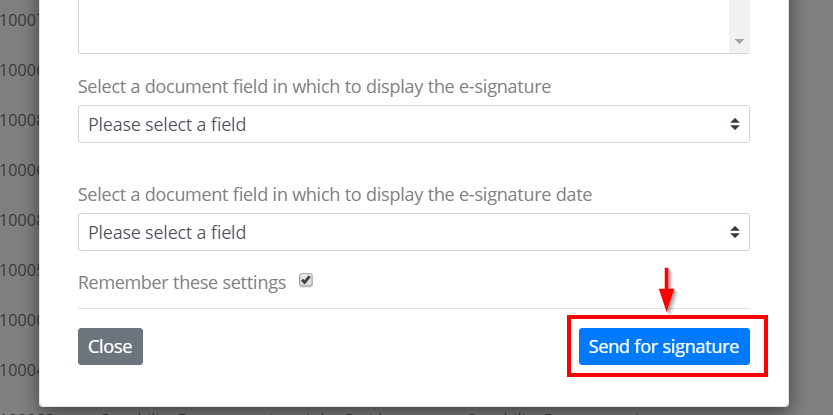
C. Complete Signing Information | Complete all information including the signers email on the Send Document for Signature page and click the Send for Signature button.
Send Document for Signature Page

Send Document for Signature Add Recipients
Send to Multiple Recipients | By selecting the plus sign next to the profile icon you are able to send a document to up to 5 recipients. Add as many recipients that you please and enter the credentials required.
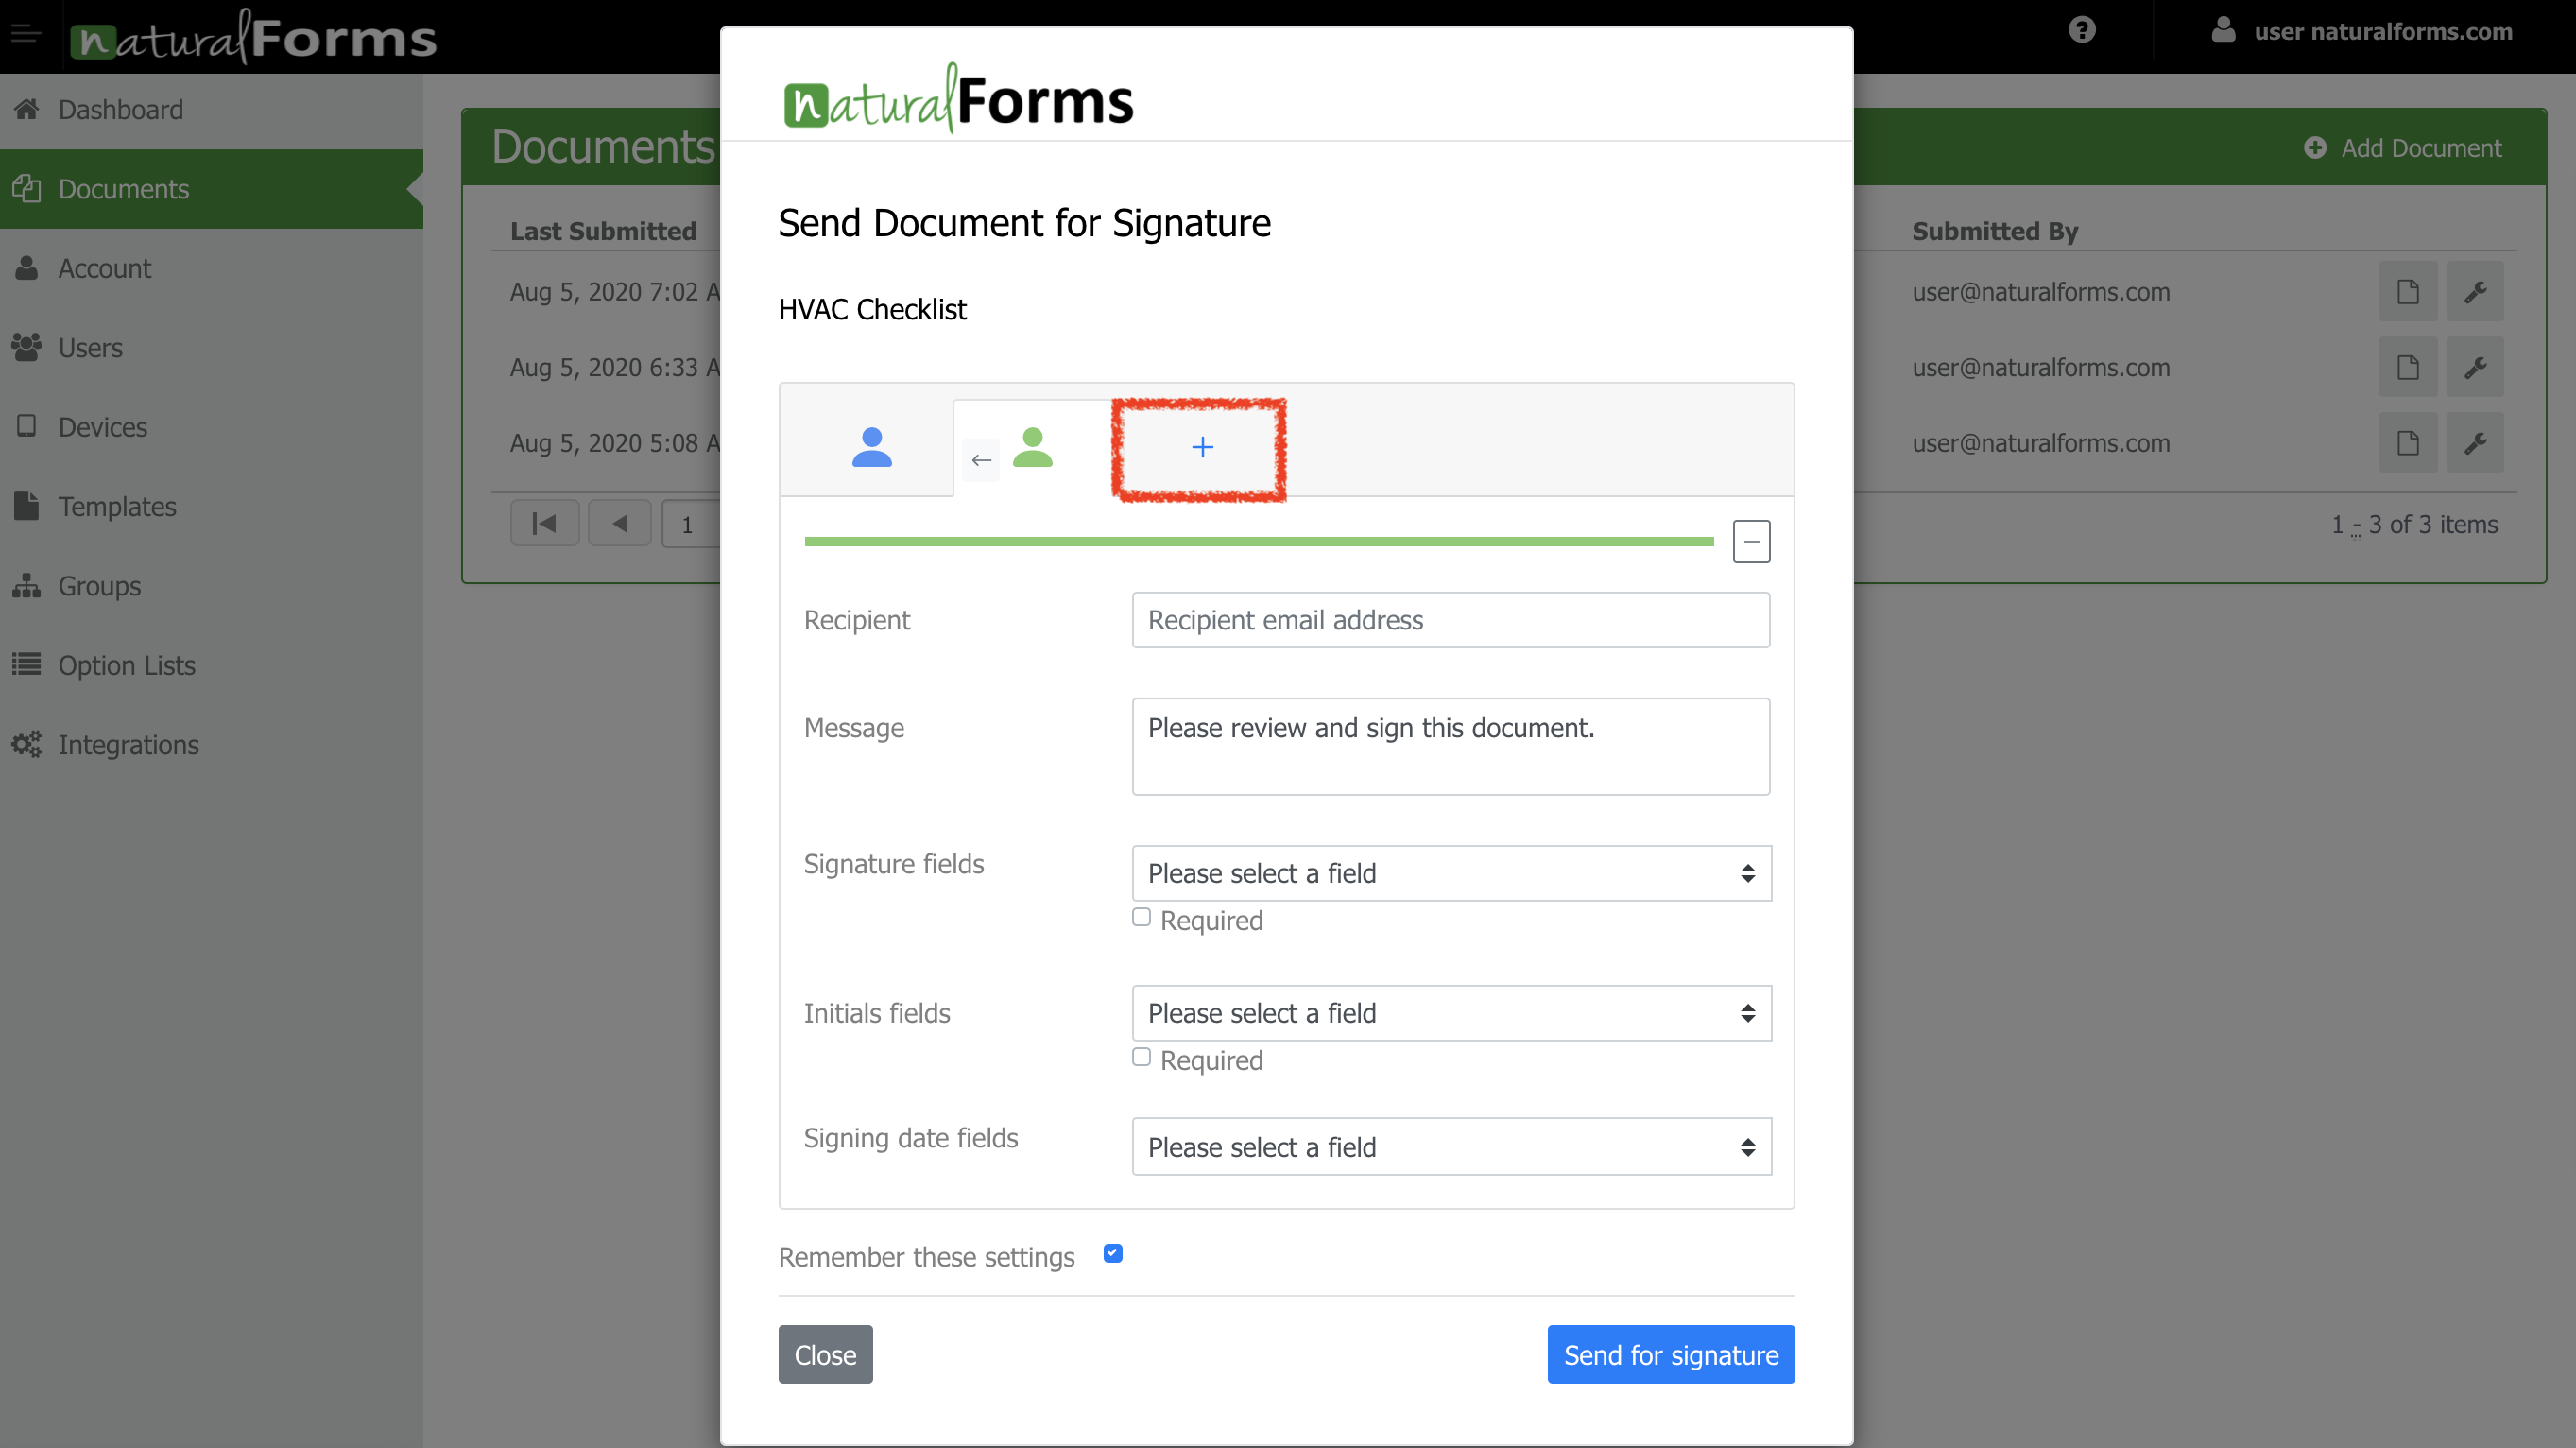
Delete Recipient | If you have added a recipient that you would no longer like to send a document for signature to, click the minus button under the profiles.
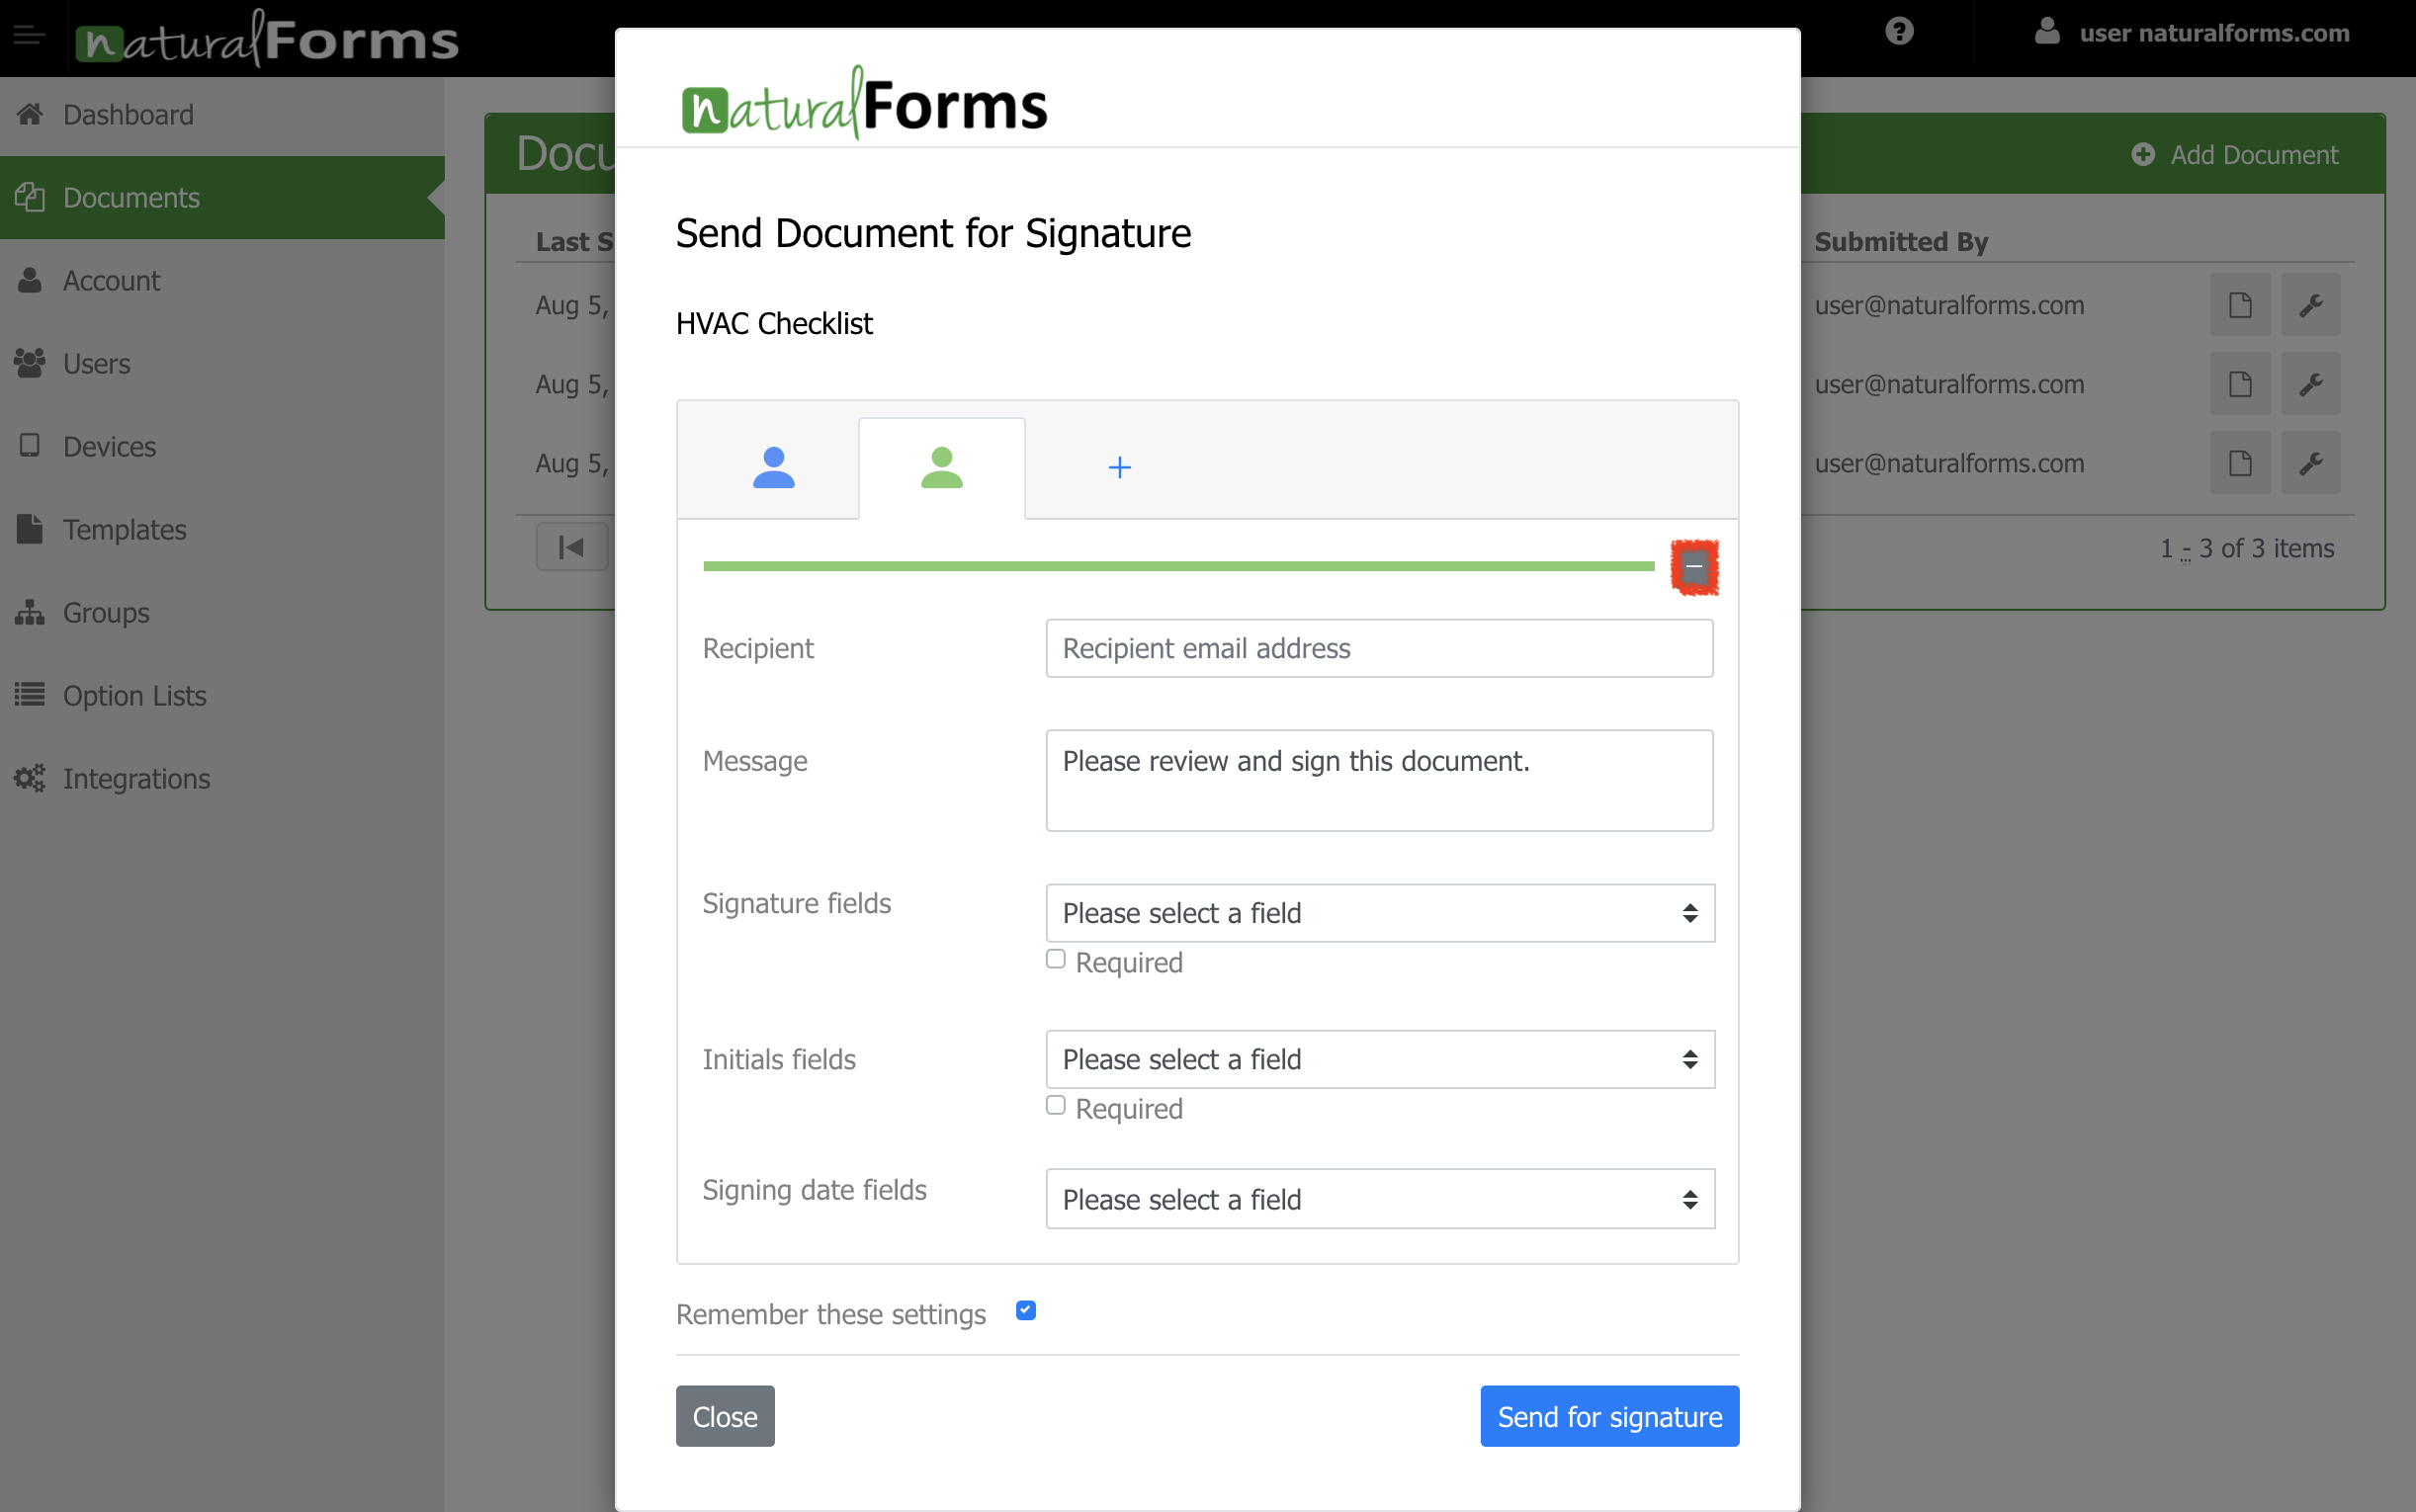
When you have completed all the required fields and the document is ready to be sent out, just select the Send for Signature button at the bottom right hand side.
Send for Signature Button
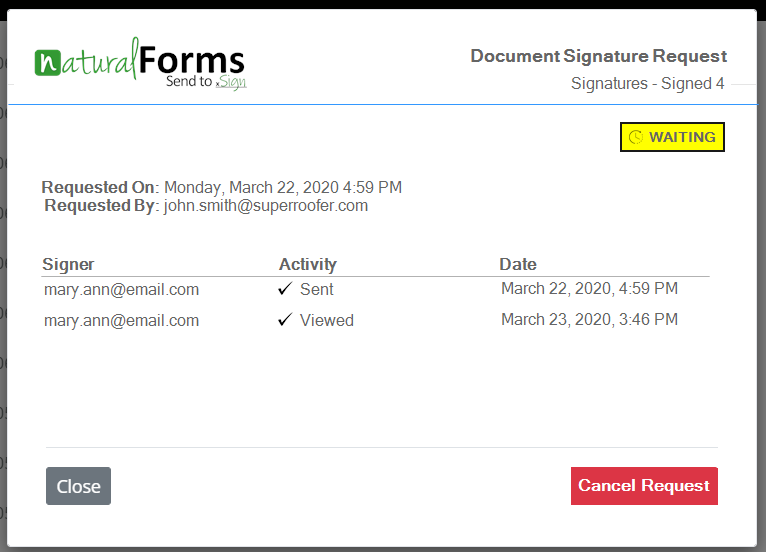
3. Signature Request & Email Notifications | The document will be successfully sent for signature. The sender and signer will receive email notifications informing the document status: sent, viewed, cancelled, declined or signed. In addition the documents when signed will be available to both the sender and signer. Documents can be downloaded from the email by the signer for document retention and appropriate file storage.
4. Document Signing Status | Once a document has been sent for signature, if the user attempts to send the same document for signature (as the steps above), the document status panel is displayed.
Document Signing Status
5. End User Document Signing | The end user will simply sign the document by clicking the link in the email to view the document and sign. For details on how the end user signing works see Sign a Document with naturalForms.
Note: The document can also be sent for signature if the document is created as a new document in the portal (via Add Document on the Documents page).